
How to Make a Calendar in Google Slides (Step-by-Step Guide)

Google Slides is not calendar software, but it is one of the fastest tools for building a calendar that actually looks good in a presentation, a report, or a shared planning deck. Whether the goal is a single monthly overview for a team meeting or a full twelve-month content calendar, the process comes down to one simple structure: a table, styled and filled in correctly.
This guide covers exactly how to build a calendar grid in Google Slides from scratch, plus a faster route using a ready-made template.
Why Build a Calendar Directly in Google Slides?
A calendar built inside Google Slides lives right next to the rest of the presentation, so a project timeline, a content plan, or a school schedule can be shown and edited without switching to another app or pasting in a screenshot. It is also fully brand-matched: the same fonts, colors, and logo already used in the deck carry straight into the calendar slide.
- No extra software: everything happens inside the deck the team already uses.
- Fully editable: dates, colors, and highlighted events can be changed slide by slide.
- Easy to share: the calendar presents, exports, or embeds exactly like any other slide.
- Brand-consistent: fonts and colors match the rest of the presentation automatically.
Two Ways to Make a Calendar in Google Slides
There are two practical routes. The first is building the grid from scratch using Google Slides’ table tool, which gives full control over every date and color. The second is starting from a pre-built calendar template and swapping in dates and events, which is faster when the design does not need to be fully custom. Both are covered below.
How to Build a Calendar Grid From Scratch: Step-by-Step
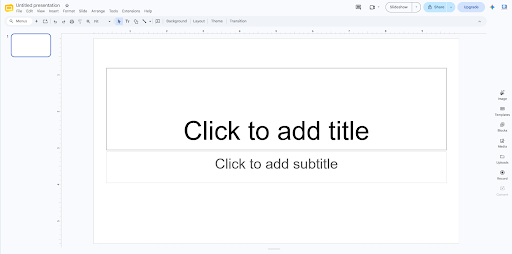
Step 1: Set Up the Slide
Open a new, blank slide and set it to widescreen (16:9) through File > Page Setup, which gives enough width for seven day columns without cramming the grid. Choose a blank layout so the table has the full slide to work with, rather than fighting a pre-set title placeholder.
Step 2: Insert a Table for the Grid
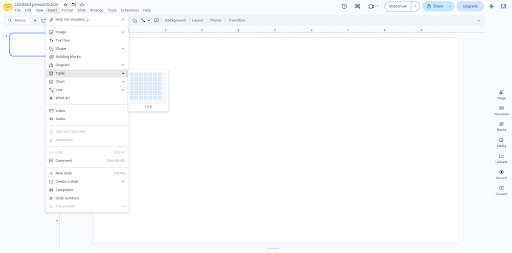
Go to Insert > Table and choose 7 columns, one for each day of the week, and 6 rows, enough to cover any month regardless of how the dates fall. Resize the table to fill most of the slide, leaving room at the top for a month title. Six rows looks slightly tall for a short month, but a consistent row count is what keeps every month’s slide the same size when they are duplicated later.
Step 3: Label the Day-of-Week Header Row
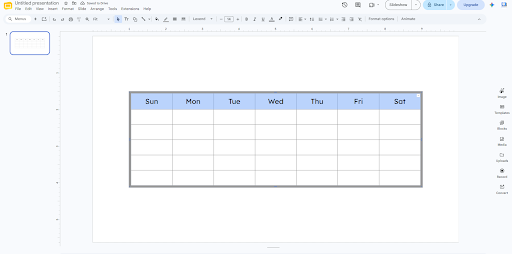
Turn the first row into a header by typing Sun, Mon, Tue, Wed, Thu, Fri, Sat across the seven cells. Bold this row, center the text, and give it a distinct background color so it reads clearly as the header rather than blending into the date cells below it.
Step 4: Fill In the Dates
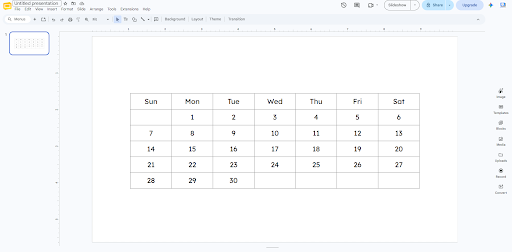
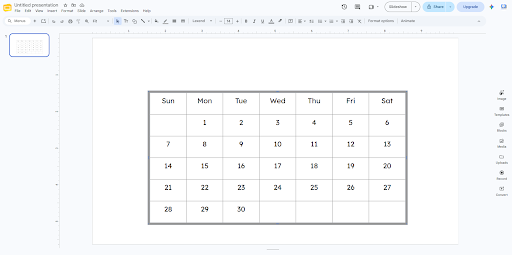
Working left to right, top to bottom, type the date numbers into each cell starting from the correct day of the week for the first of the month. Leave the cells before the first date, and any cells after the last date, empty so the grid still reads clearly as a calendar.
Step 5: Style the Grid for Readability
Set consistent cell padding through the table’s border and fill options so the date numbers do not crowd the cell edges. Use a light, neutral background for regular dates and align the date number to the top-left corner of each cell, the way most calendar apps do, so there is still room below it for an event label.
Step 6: Highlight Important Dates
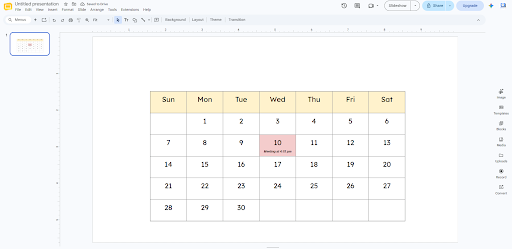
Select any cell that needs attention, a deadline, a holiday, a meeting, and change its fill color to an accent shade from the deck’s palette. Add a short label directly under the date number rather than a full sentence; a calendar cell is not the place for long text.
Step 7: Add a Month Title and Navigation Cues
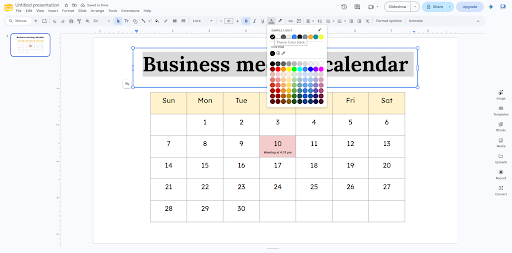
Add a text box above the grid with the month and year in a larger font size, matching the deck’s heading style. For a multi-month calendar, small arrow icons or a slide number in the corner help the audience track where they are in the sequence.
Step 8: Duplicate the Slide for Additional Months
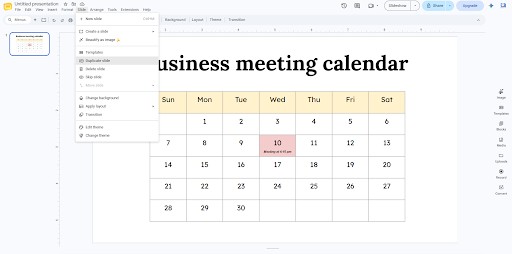
Once one month looks right, right-click the slide thumbnail and select Duplicate Slide, then update the title and date cells for the next month. Keeping the table’s size, colors, and header row identical across every month is what makes a multi-slide calendar look like one cohesive document instead of several unrelated grids.
Faster Route: Start From a Calendar Template
Building a table from scratch works well for a one-off slide, but it gets repetitive fast for a twelve-month planner or a recurring content calendar. Starting from a pre-built calendar template, already gridded, already styled, and often pre-dated for the current year, skips Steps 2 through 5 above entirely and leaves only the dates and highlights to edit.
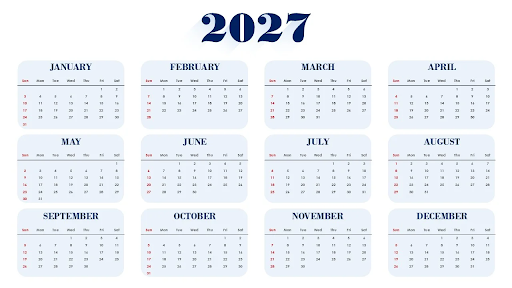
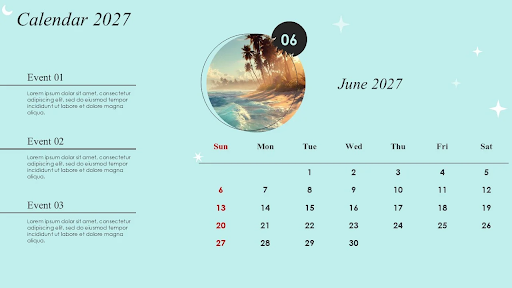
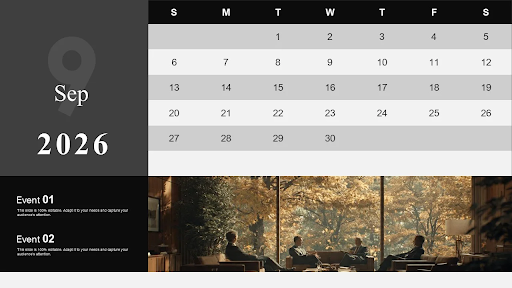
SlidesBrain’s calendar template collection includes monthly, yearly, and event-planning calendar layouts for Google Slides and PowerPoint, already formatted with headers, spacing, and color variations, so the grid work is done and only the content needs to change.
Making the Calendar Easy to Update and Share
A calendar slide gets reused far more than it gets built, so it is worth spending a moment on how it will be maintained. Group the table and any text boxes together (right-click > Group) so the layout cannot be accidentally shifted while someone is editing a single date. If the calendar will be shared with a wider team, consider locking the header row and grid lines and leaving only the date cells open for comment or edit access.
For a calendar that needs to be embedded elsewhere, Google Slides’ File > Share > Publish to the web option generates a link or embed code for the specific slide, so a single month can live on an intranet page or in an email without exporting a separate file.
Tips for a Clean, Usable Calendar Slide
- Keep the day-of-week header visually distinct from the date cells below it.
- Use no more than two accent colors for highlighted dates so key events still stand out.
- Align every date number the same way (top-left works best) across all months.
- Keep event labels short. A calendar cell is a pointer to detail, not the detail itself.
- Test the slide at presentation size. Text that is too small to read from the back of a room defeats the purpose.
Common Mistakes to Avoid
- Uneven row heights. Google Slides tables can drift out of alignment as content is added. Select the whole table and use Distribute Rows to keep every week the same height.
- Overcrowded cells. Trying to fit multiple events into one date cell makes the whole grid unreadable. Use a color highlight and a short label instead of a full description.
- Inconsistent styling across months. If each month’s slide uses different colors or fonts, the calendar stops reading as one connected document.
- Wrong starting day. Double-check which day of the week the first of the month actually falls on before filling in the grid. It is the single most common calendar-building error.
Conclusion
A calendar in Google Slides comes down to one table, built once and styled consistently. Set the grid, label the days, fill in the dates, and highlight what matters, then duplicate the slide for every month that follows. For a calendar that needs to be ready in minutes instead of built cell by cell, a pre-formatted template from SlidesBrain’s calendar collection gets to the editing step immediately.
Frequently Asked Questions
Can you make a calendar in Google Slides?
Yes. Insert a 7-column table for the days of the week and up to 6 rows for the weeks in a month, then label the header row and fill in the dates.
What is the fastest way to make a calendar in Google Slides?
Starting from a pre-built calendar template is faster than building a table from scratch, since the grid, spacing, and header formatting are already done.
How do I highlight important dates on a Google Slides calendar?
Select the date cell and change its fill color to an accent shade from the presentation’s color palette, then add a short label under the date number.
Can a Google Slides calendar cover a full year?
Yes. Build or import one month, then duplicate that slide for each remaining month, keeping the grid size and styling identical across all twelve.
Where can I find ready-made calendar templates for Google Slides?
SlidesBrain offers a calendar template collection with monthly, yearly, and event-planning layouts built for both Google Slides and PowerPoint.
Can I share a Google Slides calendar as a link instead of a file?
Yes. Use File > Share > Publish to the web to generate a link or embed code for the calendar slide without exporting a separate file.
How do I keep a multi-month calendar consistent?
Build and style the first month completely, then duplicate that slide for every remaining month so the grid size, header row, and colors stay identical across the set.