
How to Mask Images in PowerPoint: Step by Step Guide
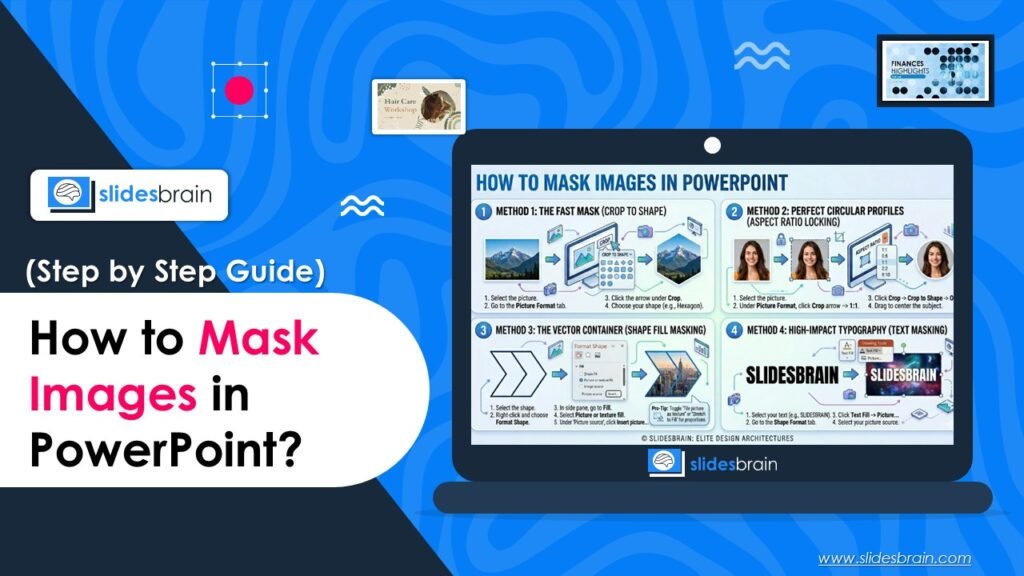
Visual storytelling has evolved far beyond simply inserting static, rectangular images onto a presentation slide. Standard square or rectangular photos often create unnecessary clutter, disrupting alignment and drawing focus away from core data points. To build world-class, investor-ready pitch decks and corporate presentations, design professionals rely on image masking. Masking is a non-destructive framing technique that clips a photo into a specific geometric silhouette, vector path, or typography layout, completely hiding unwanted backgrounds while fully preserving the underlying asset for future adjustments.
By mastering native masking techniques directly within Microsoft PowerPoint, you eliminate the need for external graphic design suites like Adobe Photoshop. This comprehensive guide details the practical mechanics and tactical use cases of PowerPoint’s primary masking methods. From structuring pristine executive profile slides to executing complex vector interventions with the Intersect tool, this blog provides step-by-step workflows to transform raw media assets into cohesive, polished slide elements.
What is Image Masking in PowerPoint?
It is a process of displaying an image in a frame, boundary or defined shape. This method helps to hide parts of the image instead of displaying the rectangular shape. It only shows the part of the image which is inside the rectangle, circle or icon, masking preserves the image while controlling what is exactly visible.
Method 1: The Fast Mask (Crop to Shape)
This beginner-friendly approach is the fastest way to turn standard rectangular imagery into polished corporate cards, hexagons, or rounded content blocks, establishing immediate visual symmetry across data grids.
- Open your PowerPoint presentation, select your slide, and click the Insert tab.
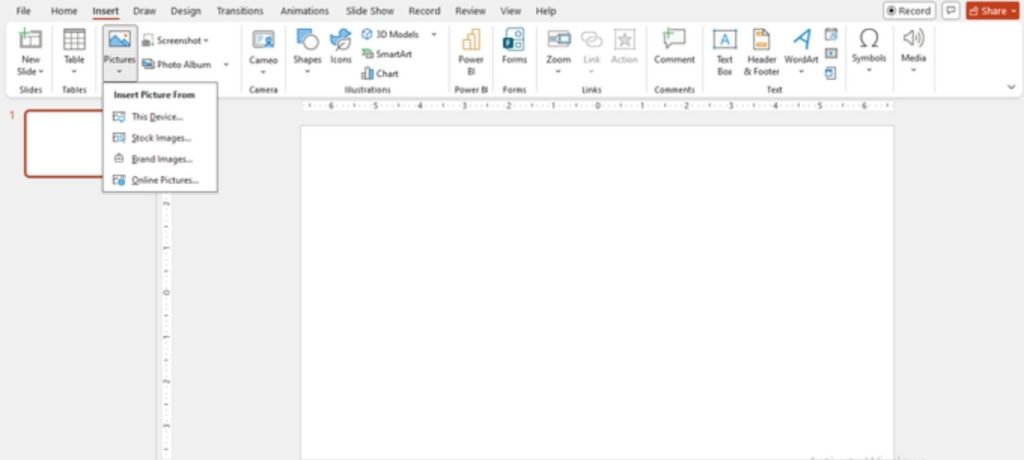
- Insert Your Media: Click Insert > Pictures and import your targeted image onto the active slide.
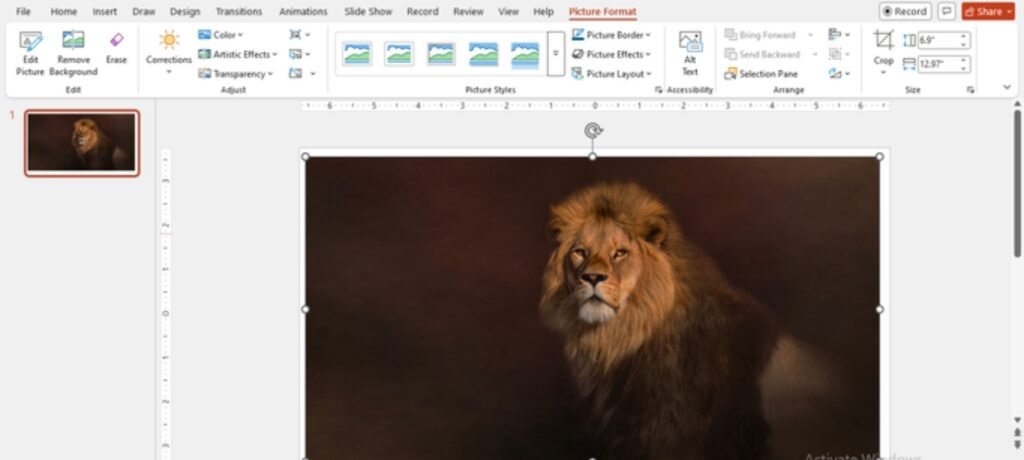
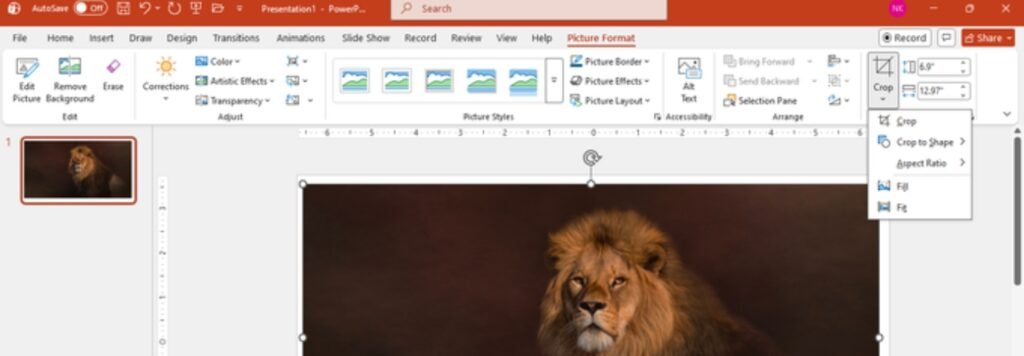
- Access Contextual Tools: Select the image to reveal the Picture Format tab on the top application ribbon as given in the above image.
- Locate the Crop Tool: Within the Size group on the far right, click the small arrow directly beneath the main Crop icon to open its advanced dropdown menu.
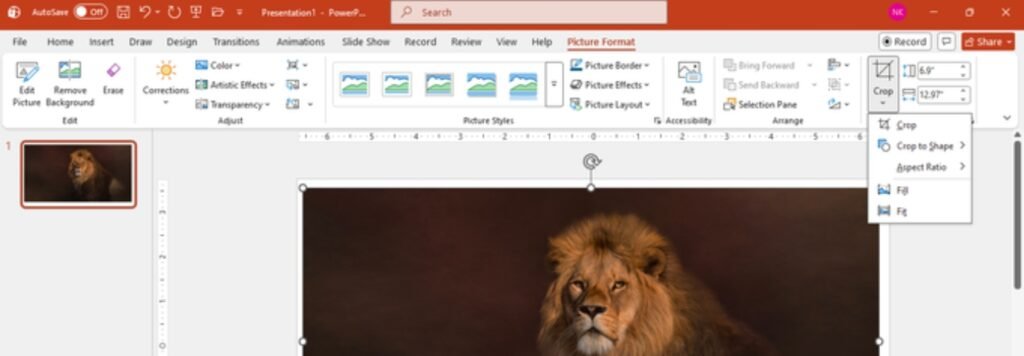
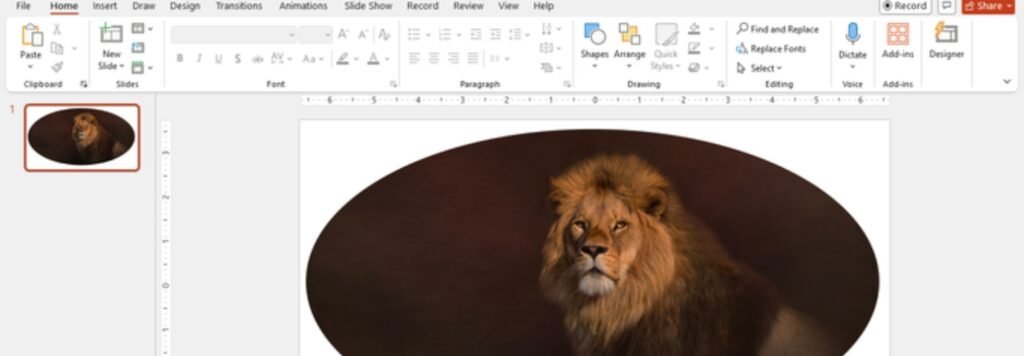
- Select Your Silhouette: Hover over Crop to Shape, and select your desired geometric boundary (example, Rounded Rectangle or Hexagon). The image frame instantly adapts to the chosen vector canvas.
- Access Contextual Tools: Select the image to reveal the Picture Format tab on the top application ribbon as given in the above image.
- Locate the Crop Tool: Within the Size group on the far right, click the small arrow directly beneath the main Crop icon to open its advanced dropdown menu.
- Select Your Silhouette: Hover over Crop to Shape, and select your desired geometric boundary (example, Rounded Rectangle or Hexagon). The image frame instantly adapts to the chosen vector canvas.
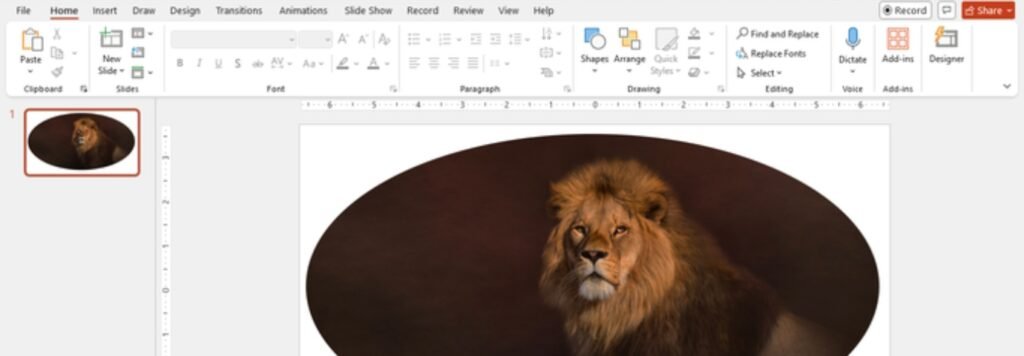
Pro-Tip: Adjustable Vector NodesMany geometric silhouettes feature an adjustable yellow diamond node when selected. Click and drag this node to modify the shape’s physical geometry, such as sharpening or deepening the corner radius of a rounded rectangle without distorting the photo inside.
Method 2: How to Convert a Photo to a Circle (Aspect Ratio Locking)
A common design pitfall is masking an uncropped portrait directly into an oval shape, which vertically stretches or horizontally compresses the subject’s face. To establish perfectly uniform team bios or speaker profiles, you must force a 1:1 square ratio before activating the shape mask.
Isolate the Image: Click on the specific portrait or headshot asset on your slide layout.
Lock Aspect Ratio: Head to Picture Format > Crop dropdown arrow. Hover over Aspect Ratio and select 1:1. PowerPoint wraps a solid square cropping box over the photo.
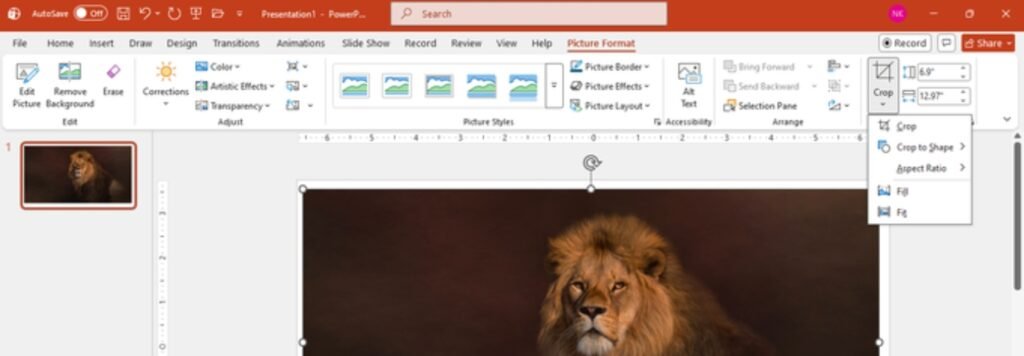
Align the Subject: Manually drag the image space behind the dark bounding lines to center the subject’s face within the square preview frame.
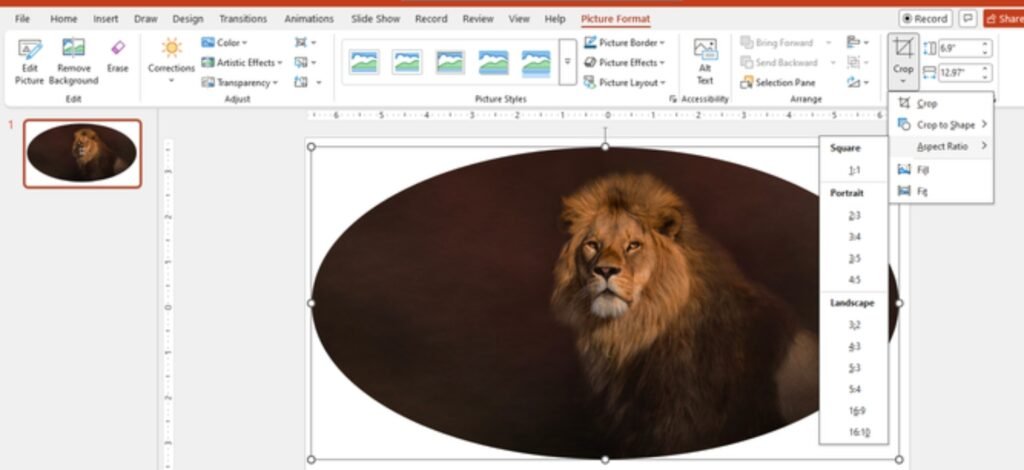
Apply Circle Mask: Without clicking away, return to the Crop dropdown, hover over Crop to Shape, and select the Oval tool found under Basic Shapes. Because the crop aspect ratio is locked at 1:1, this oval outputs as a flawless, unwarped circle.
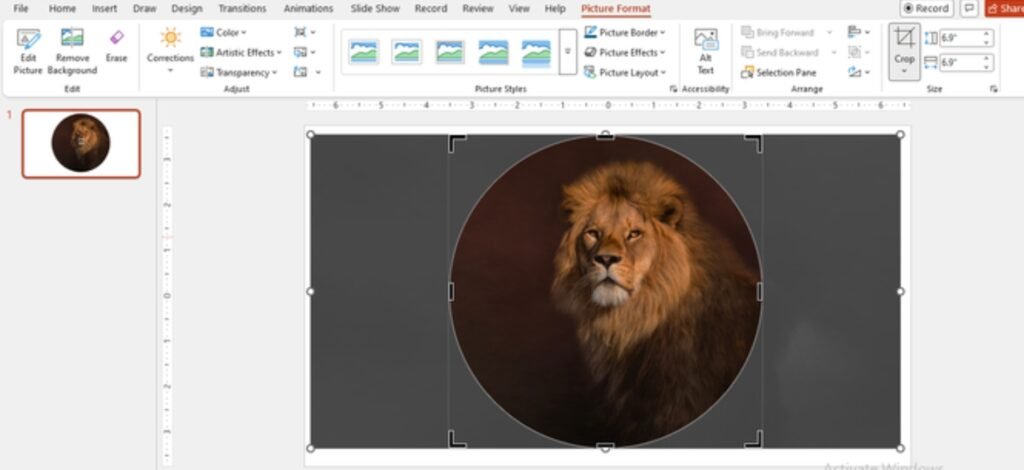
Method 3: The Vector Container (Shape Fill Masking)
When a presentation deck incorporates specialized, pre-formatted placeholder layouts or when working with asymmetrical shapes like banners, chevrons, or complex polygons, it is highly efficient to draw the vector shape first, then treat it as an image container.
Draw Your Canvas: Navigate to Insert > Shapes and map out your required geometry on the slide.
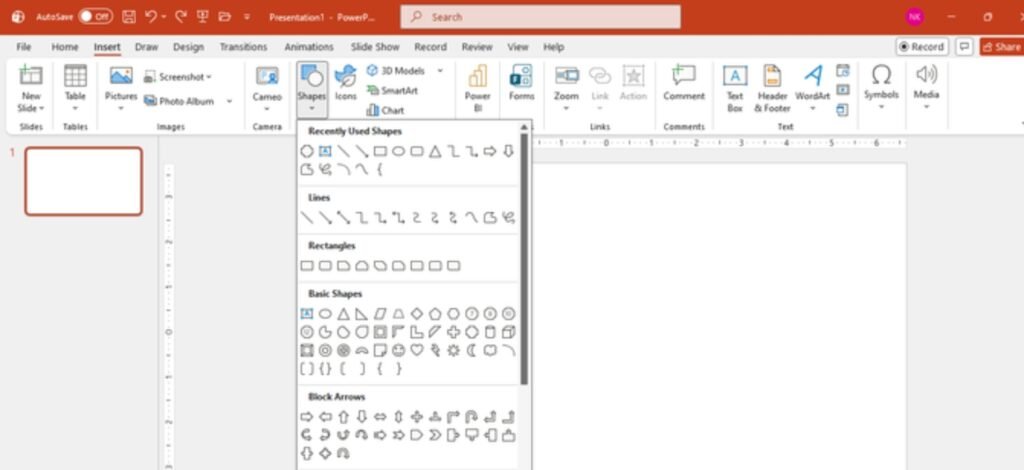
Open the Formatting Drawer: Right-click the shape and select Format Shape. A dedicated formatting panel will dock on the right side of your interface.
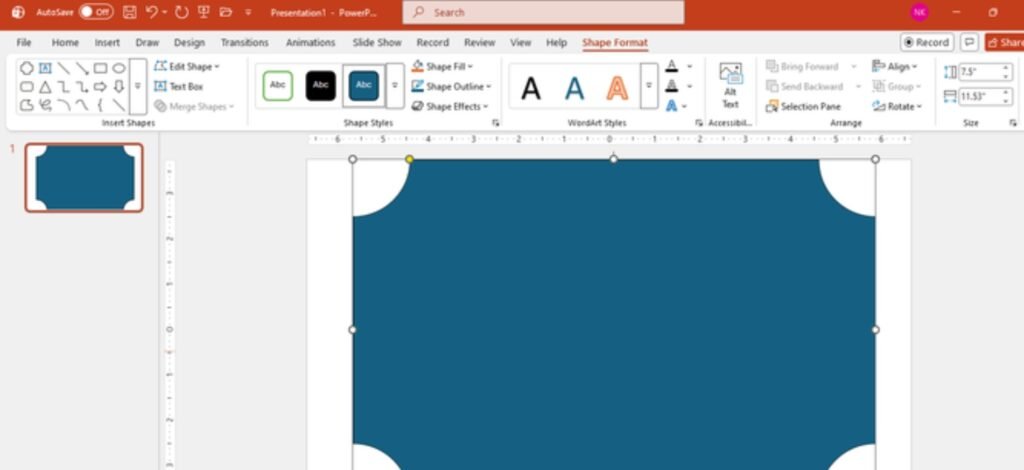
Modify Fill Parameter: Expand the Fill accordion menu in the right-hand panel, and select the radio button labeled Picture or texture fill. .
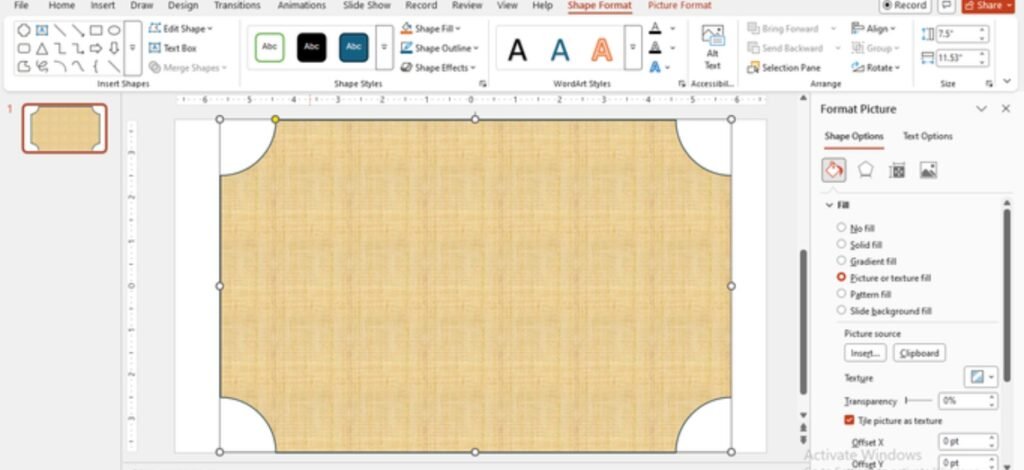
Source Your Image Asset: Under the Picture source option header, click Insert. Choose your target file from a local drive, icon library, or stock repository. The selected photo maps seamlessly inside the shape borders.
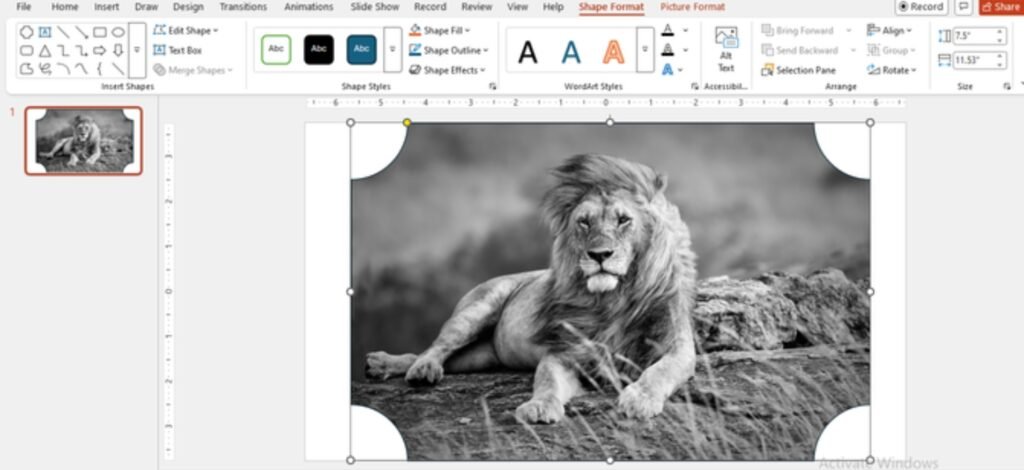
Distorted Aspect Ratios
- PowerPoint defaults to stretching your photo to fit the explicit width-to-height ratio of you custom shape. If your asset appears squashed or elongated, select the shape container, head to Picture Format, and click the core Crop button. PowerPoint will display the unwarped photo boundaries. Simply toggle the option from Stretch to Fill in the drop options or manually scale via the black handles to re-establish perfect, natural proportions.
Method 4: High-Impact Typography (Text Masking)
For slide titles, editorial chapter dividers, or bold marketing decks, displaying rich textures or scenery photos directly through typed characters generates a striking, professional aesthetic.
Generate Bold Lettering: Click Insert > Text Box and type your targeted header keyword. For optimal results, change the font family to heavy, block-based, sans-serif weights (e.g., Impact, Arial Black, or Montserrat Extra Bold) and scale the text size to 72pt or higher.
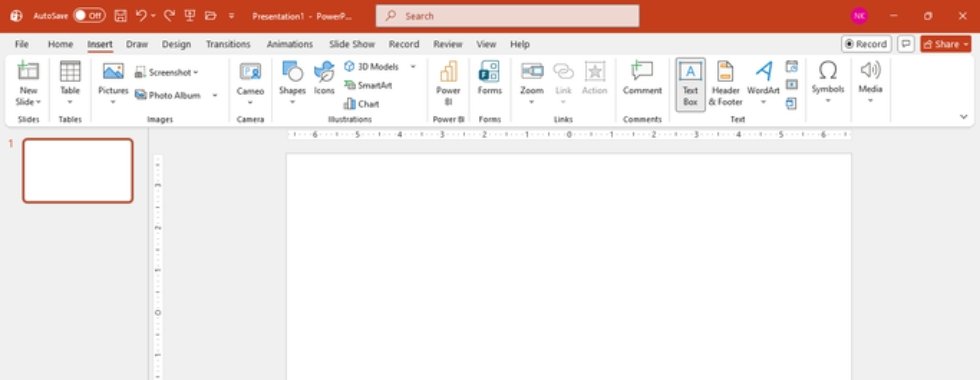
Select the Text Container Frame: Click explicitly on the outer border of the text box. Ensure the boundary line transitions from a dashed pattern to a continuous solid line, indicating the entire container is targeted.
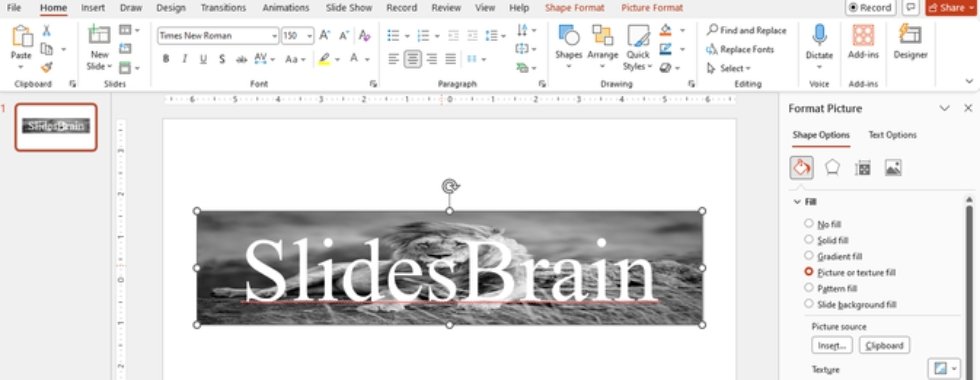
Navigate to Shape Format: Select the contextual Shape Format tab on the main ribbon menu.
Execute Text Image Fill: Locate the WordArt Styles design group. Click the small dropdown arrow directly next to the Text Fill utility icon and select Picture.
Link Source Media: Select your file from the insertion dialogue box. The chosen texture or graphic instantly locks into the physical footprint of your text characters.
Strategic Selection Matrix
Use this alignment matrix to select the ideal image masking framework for your specific slide layouts:
| Masking Method | Target Use Cases | Complexity | Key Strategic Advantage |
|---|---|---|---|
| Crop to Shape | Quick card components, standard UI layout grids, basic framing | Beginner | Rapid execution; retains active native shape adjustment nodes |
| Aspect Ratio 1:1 | Corporate profile pages, executive headshots, speaker profiles | Beginner | Prevents distortion; ensures flawless, uniform circular metrics |
| Shape Fill Container | Asymmetric layouts, branded infographic models, chevron tracks | Intermediate | Allows granular positioning and micro-adjustments via sidebar offset parameters |
| Text Fill Mask | Editorial landing slides, thematic dividers, bold brand messaging | Intermediate | Maintains fully live, editable text layers while hosting vivid image textures |
| Shape Intersect | Graphic geometric mosaics, complex icon maps, custom organic cutouts | Advanced | Unifies a singular continuous image across multiple distinct shape elements |
Premium Template Solutions: Image Mask PowerPoint Templates
While native masking gives you total flexibility, manually cropping images into shapes across a 50-slide presentation can devour hours of your design time. To bypass the manual geometry and scale your production, using pre-engineered PowerPoint templates with built-in picture masks offers a faster solution. By deploying pre-engineered PowerPoint templates with built-in picture masks, you can access striking, production-ready frameworks with zero manual drafting.
For elite design architectures, explore the premium options curated by SlidesBrain. Their stylized frameworks help you deploy compound shape layouts using fully editable, drag-and-drop presentation slides.
For advanced, modern visual behaviours, standard static geometry often falls flat. Integrating organic, moving shapes via this template delivers instant engagement for title animations and transition cards. These pre-formatted decks feature organic liquid shapes combined with native PowerPoint entrance and emphasis animations to make your core message distinct. Furthermore, the animated liquid boundaries remain fully vector-fluid, allowing you to reposition, rescale, or duplicate elements across your workspace. Simply right-click to replace the default sample media with your custom imagery to lock down professional, high-concept animations.

If your primary task is showing a modern business project and trend shifts, this PowerPoint template provides curated layouts optimised for corporate profiles, team headshots, product mockups, and strategic timelines. This slide kit embeds native shape mask placeholders natively into the layout hierarchy, bypassing formatting distortion. Use these structured canvases to demonstrate corporate strength, product-market fit, and team infrastructure while keeping a tight, unified design theme.

The hospitality sector is one of the most visually driven industries in the world, and a pitch deck for a hotel or resort project needs to match the standard of the experience it is selling. The Hotel and Resort Pitch Deck PPT Presentation Template from SlidesBrain is built with exactly that bar in mind.

This template gives hospitality entrepreneurs, developers, and operators a complete investor-ready deck in a format that looks as considered as the property concept itself. The slide architecture follows the logic investors and development partners expect: an opening that sets the property vision and market opportunity, followed by structured sections covering the concept overview, target guest profile, competitive positioning, amenities and accommodation offerings, revenue model, financial projections, and the investment ask. Every slide has a defined role, so the narrative moves without gaps.
Conclusion
Utilizing native image masking techniques within PowerPoint represents a fundamental shift from simple layout assembly to professional visual communication. By transforming raw rectangular imagery into deliberate geometric, typographic, or composite vector configurations, you actively build strong visual hierarchy and ensure absolute symmetry across your slide decks. This minor technical upgrade significantly reduces visual noise, allowing audiences to process complex information and qualitative data quickly.
When applying these strategies, remember to evaluate the analytical context of your presentation. While circular profiles are excellent for humanizing pitch decks and text masks add dynamic editorial flair to section headings, minimalism remains critical for data-heavy executive summaries. Select your masking methodology based on the structural demands of your layout, leverage non-destructive aspect ratio tools to eliminate image warping, and leverage these native PowerPoint workflows to output elite, investor-ready presentation assets.
Alternatively, you can select the SlidesBrain predesigned image masking templates. This helps to create unmatched mask image templates for your powerful presentation.
Frequently Asked Questions (FAQ)
Q: Will masking or cropping a photo permanently erase the parts I hide?
A: No! PowerPoint masking is completely safe. The software just hides the edges of your image behind a shape container. If you ever change your mind, you can click the image, go to the Crop menu, and move or resize the hidden parts of the photo whenever you want.
Q: Why does my picture look squished or stretched inside the shape?
A: This happens because PowerPoint forces your photo to match the exact width and height of the new shape. You can fix this in two clicks: select the shape, go to Picture Format, click the arrow under Crop, and choose Fill. Your photo will instantly look normal again.
Q: How do I change the picture inside a shape without losing the mask?
A: If you used the Shape Fill method (Method 3), you don’t need to redraw anything. Just right-click the shape, choose Format Shape, go to the Fill menu, click Insert under the picture source, and pick your new photo. The new image will automatically take the exact same shape.
Q: Can I turn a photo into a circle on PowerPoint for Mac?
A: Yes! The steps are exactly the same. Select your image, go to the Picture Format tab on your top menu bar, look for the Crop dropdown, and use the Aspect Ratio (1:1) tool followed by Crop to Shape (Oval).
Q: Can I use this trick for video files too?
A: Yes, but only for Method 1 (Crop to Shape). You can click on a video in PowerPoint, go to the Video Format tab, and crop it into a circle or rounded rectangle just like a regular photo. The video will play normally inside that shape boundary.